Desserts
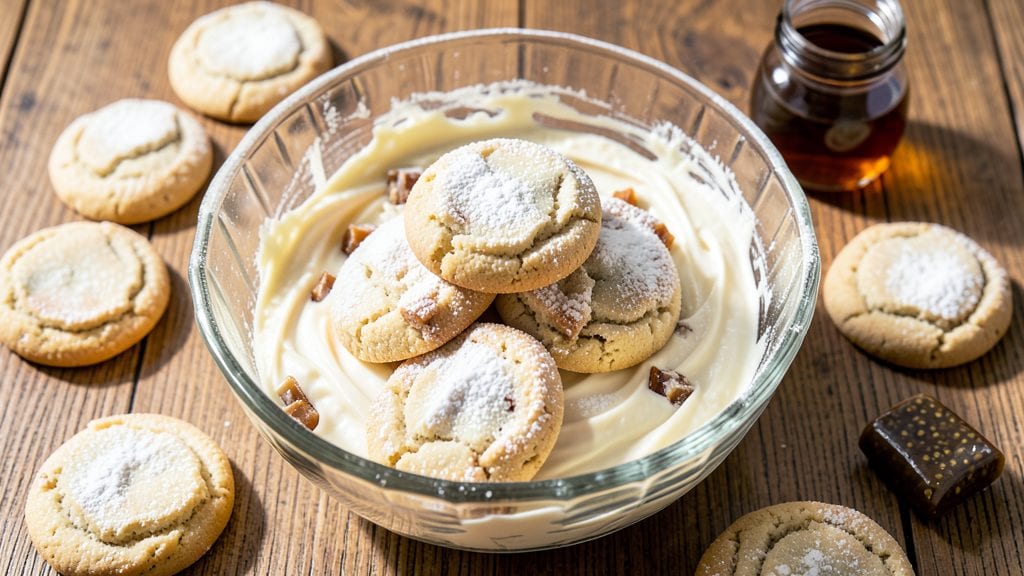
This old-fashioned sour cream sugar cookie recipe delivers the perfect balance of tender crunch and buttery vanilla swirls that define classic holiday baking. The secret lies in creaming butter and sugar until light, then folding in sour cream for that signature texture.
I've perfected this recipe over years of baking, ensuring each cookie achieves the ideal press-and-cut crunch while maintaining a melt-in-your-mouth center.
The process begins with a precise blend of ingredients—flour, butter, sugar, and sour cream—mixed to create a dough that's firm enough to press through a cookie cutter but tender enough to hold its shape.
Chilling the dough for at least 2 hours is critical; it prevents spreading and allows the flavors to meld. The result is a cookie with a crisp exterior and a soft, pillowy interior, all infused with vanilla's warm aroma.
What sets these apart is the vanilla swirl, created by folding in vanilla bean paste or extract into the dough before pressing. This technique ensures every bite carries that signature vanilla flavor without overpowering the buttery sweetness.
The cookies bake to a golden hue, their edges slightly crisp while the centers remain tender—a hallmark of old-fashioned baking.
For presentation, dust with powdered sugar or add a simple vanilla glaze, but the real magic is in the texture. These cookies stay fresh for days, making them ideal for holiday gifting or family gatherings. Let's get baking—your kitchen will smell like nostalgia in minutes.
Ingredients for old fashioned sour cream sugar cookie
Butter, sugar, and sour cream—classic trio for cookies with perfect press-and-cut crunch.
| Ingredient | Amount | Notes |
|---|---|---|
| Unsalted Butter 🧈 | 1 cup | Cold, cubed for creaming |
| Granulated Sugar 🍚 | 1 ½ cups | Superfine preferred for smoothness |
| Sour Cream 🥛 | ½ cup | Full-fat for best texture |
| All-Purpose Flour 🌾 | 3 cups | Sifted for lightness |
| Pure Vanilla Extract 🌿 | 2 tsp | High-quality for flavor |
| Vanilla Bean Paste 🌿 | 1 tbsp | For swirls and speckles |
| Baking Soda 🧂 | ½ tsp | Ensures proper rise |
| Salt 🧂 | ½ tsp | Fine sea salt preferred |
| Powdered Sugar 🍚 | ½ cup | For dusting and glaze |
| Heavy Cream 🥛 | ¼ cup | For optional vanilla glaze |
| Milk 🥛 | 1 tbsp | Adjusts dough consistency |
The butter is non-negotiable here—European-style unsalted butter like Plugrá or Kerrygold gives the best flavor and texture. Look for sticks that are at least 82% fat content, and make sure it's cold when you measure it. The sour cream should be full-fat (none of that non-fat nonsense)—breakfast-style from the dairy aisle works perfectly. For the vanilla, Madagascar bourbon vanilla extract adds depth, but good old Nelson & Palliser is a solid budget pick. If you're using vanilla bean paste, Madagascar or Tahitian beans offer the most aromatic experience. Sift your flour before measuring to avoid dense cookies, and store it in the freezer if you're not using it within a month.
No sour cream? Plain Greek yogurt at the same amount works in a pinch, though the texture won't be identical. Short on butter? Coconut oil can replace up to half, but the flavor will be subtly different. The vanilla bean paste is optional but worth it—if you can't find it, double the vanilla extract. For the powdered sugar, Domino or Culinary Art brands are reliable, but avoid the ultra-fine varieties that can make the cookies too soft. The heavy cream for the glaze can be swapped for half-and-half, though it won't be as rich. And if your dough feels too dry, add 1 tbsp milk at a time until it's just workable—don't overdo it or the cookies will spread.
These cookies stay fresh for 5-6 days in an airtight container at room temperature, though I find they're best within the first 2 days. For longer storage, freeze the shaped cookies on a tray before transferring to a bag—up to 3 months in the freezer. To reheat, bake at 300°F for 3-4 minutes. The dough must chill for at least 2 hours before pressing, so plan ahead. If you're making these for a party, shape them the day before and store them in the fridge—they'll hold their shape beautifully. And trust me, double the batch—they disappear fast.
Why You'll Love This Recipe
- No-Fuss Mixing: I swear by this dough—just cream butter and sugar, fold in sour cream, then dump in flour. No stand mixer required, no overworking the dough. My hands are still clean when the cookies hit the oven.
- Secretly Rich Flavor: That sour cream makes all the difference—tender crumb, buttery depth, and just enough vanilla warmth. Honestly, the first bite tastes like a hug from your grandma’s kitchen.
- Holiday or Snack: Perfect for Christmas cookies or a midweek craving. Roll them into classic shapes or drop spoonfuls for a lazy afternoon. My kids ask for these year-round, not just December.
- Budget-Friendly Batch: Uses pantry staples and stretches far. A single batch feeds a crowd or lasts me weeks in the freezer. Between us? This is my go-to for parties where I’d rather spend time talking than baking.
Step-by-step instructions for old fashioned sour cream sugar cookies
Here's how to create classic press-and-cut cookies with perfect texture and vanilla swirls every time.
Cream the Butter and Sugar Together
In a large mixing bowl, combine the 1 cup unsalted butter (cold, cubed) with the 1.5 cups granulated sugar. Using an electric mixer on medium speed, beat for 3-4 minutes until the mixture becomes light and fluffy. You'll notice it nearly doubles in volume and turns pale, which means air has been incorporated—this creates that signature tender crumb.
The butter should be completely creamed but not melted. If it looks like it's starting to turn into a liquid, stop and let the bowl cool for 1-2 minutes before continuing. This step is critical for achieving the perfect texture in your cookies.
Add Sour Cream and Vanilla
Reduce the mixer speed to low and add the 0.5 cup sour cream, mixing until fully combined. Then, add the 2 teaspoons pure vanilla extract and 1 tablespoon vanilla bean paste, mixing just until the paste is evenly distributed. The vanilla bean paste will create beautiful speckles throughout your cookies.
Here's where the magic happens: the sour cream adds moisture and richness while keeping the cookies tender. If your dough seems too thick at this point, don't worry—we'll adjust it in the next step. The vanilla bean paste will give you those classic speckled swirls that make these cookies stand out.
Combine Dry Ingredients
In a separate bowl, whisk together the 3 cups all-purpose flour, 0.5 teaspoon baking soda, and 0.5 teaspoon salt. Gradually add this dry mixture to the wet ingredients, mixing on low speed just until combined. Be careful not to overmix—stop as soon as the flour disappears, as overworking the dough develops gluten, which makes cookies tough.
Once combined, add the 1 tablespoon milk and mix again until the dough comes together. If it's still too dry, add 1 more teaspoon of milk to help bind everything. The dough should be soft but manageable. At this point, you can either press out the cookies immediately or cover the bowl with plastic wrap and refrigerate for 30 minutes to make the dough easier to work with.
Prepare the Dough for Pressing
If you refrigerated the dough, remove it from the fridge and let it sit at room temperature for 10-15 minutes to soften slightly. Preheat your oven to 375°F and line two baking sheets with parchment paper. The dough should be cool enough to handle but still soft enough to press through a cookie press.
Divide the dough into 4 equal portions (about 1 cup each) and wrap three of them in plastic wrap. Keep one portion out to work with while the others chill in the fridge. This keeps the dough from becoming too warm and sticky as you work. If the dough feels too warm, return it to the fridge for 5-10 minutes before pressing.
Press and Bake the Cookies
Using a cookie press fitted with a star or fluted tip, press 2-inch circles of dough onto the prepared baking sheets, spacing them about 2 inches apart. Press firmly but evenly to create uniform cookies. Gather the scraps and re-roll them into balls to use for additional cookies.
Bake the cookies for 8-10 minutes until the edges are light golden brown but the centers still look slightly soft. They'll continue to set as they cool. Rotate the baking sheets halfway through for even baking. Once done, transfer the cookies to a wire rack to cool completely.
Optional Vanilla Glaze
For the classic touch, mix the 0.5 cup powdered sugar with the 0.25 cup heavy cream in a small bowl until smooth. Dip the cooled cookies into the glaze or drizzle it over the top. Allow the glaze to set for 10 minutes before serving or storing.
The glaze should be thick enough to coat the cookies without dripping. If it's too thin, add a bit more powdered sugar. These cookies are best enjoyed fresh but can be stored in an airtight container for up to 5 days or frozen for 3 months. The glaze will keep them soft and delicious!
Pro Tips For Making Old Fashioned Sour Cream Sugar Cookie
- CREAM THE BUTTER SLOWLY: Mix the softened butter and sugar in short bursts—30 seconds on, 30 seconds off—until light and fluffy. I used to rush this, ending up with dense cookies that tasted more like cake dough. Let the mixer do the work here; patience pays off.
- CHILL THE DOUGH TWICE: Divide the dough into two portions, wrap tightly, and refrigerate for at least 24 hours. After shaping, freeze the balls for 15 minutes before baking—this prevents spreading and ensures a tender crumb. Yes, it’s extra steps, but the texture makes it worth it.
- WEIGH YOUR FLOUR: Spoon the all-purpose flour into the scale, then level it off with a knife—don’t scoop directly from the bag. Flour compacts differently, and this recipe relies on precision. A cup of flour isn’t always a cup; trust the scale for consistent results.
- BAKE ONE SHEET AT A TIME: Crowding the oven leads to uneven baking—space the cookies 2 inches apart on a single sheet. Use the middle rack and rotate the pan halfway through for even golden edges. I learned this after pulling out pale, doughy centers and over-browned edges in the same batch.
Pro cooking tips for great old fashioned sour cream sugar cookie
Butter Creaming Mastery
The key to tender cookies starts with perfectly creamed butter and sugar. Use a stand mixer with the paddle attachment and beat the 1 cup cold cubed butter with 1.5 cups sugar on medium speed for 3-4 minutes until light and fluffy.
If your butter melts too quickly, chill the bowl for 2 minutes—this prevents greasy cookies. I swear by Plugrá butter for its high fat content and rich flavor, but Kerrygold is a close second. 🧈
Dough Temperature Control
Cold dough prevents spreading and ensures clean edges. After mixing, divide the dough into 4 portions and refrigerate 3 portions while working with the first. If the dough feels too warm, pop it back in the fridge for 5-10 minutes.
I’ve ruined batches by skipping this step—always prioritize cold dough over speed. A dough scraper helps keep things tidy while working with chilled portions. ❄️
Pressing Technique Tips
Use a cookie press with a star or fluted tip for classic designs, pressing 2-inch circles onto parchment-lined sheets. Space them 2 inches apart to prevent spreading. For a rustic look, roll dough balls by hand and press with a fork.
Press firmly but evenly—uneven pressure causes lopsided cookies. I like to gather scraps and re-roll them into new balls for zero waste. 💪
Baking Time Precision
Bake at 375°F for 8-10 minutes until edges are light golden brown but centers look soft. Overbaking dries them out—pull them when they still feel slightly underdone. Rotate sheets halfway for even heat.
Let cookies cool 5 minutes on the sheet before transferring to a rack. This prevents cracking and preserves their shape. A timer is non-negotiable here! ⏰
Glaze Consistency Secrets
For the vanilla glaze, whisk 0.5 cup powdered sugar with 0.25 cup heavy cream until smooth. It should coat the back of a spoon but not drip. If too thin, add 1 tbsp more sugar; if too thick, add 1 tsp cream.
Dip cookies halfway or drizzle for a decorative touch. Let glaze set 10 minutes before stacking—this prevents sticking. 🍯
Chilling Cannot Be Skipped
Chill the dough for at least 2 hours before pressing. This relaxes the gluten, prevents spreading, and deepens flavors. I’ve made the mistake of skipping this step—cookies spread into sad pancakes.
Wrap dough tightly in plastic or use an airtight container to prevent drying. If short on time, chill for 1 hour in the freezer. Patience here makes all the difference. ⏳
Nutrition facts
Frequently asked questions
Why does this recipe use sour cream instead of regular milk?
The sour cream creates a tender, melt-in-your-mouth texture that regular milk can't match. It adds moisture and richness while preventing the cookies from becoming too dense. The acidity in sour cream also helps activate the baking soda for better rise and flavor development.
Can I make these cookies without a cookie press?
Roll the chilled dough into 1-inch balls and place them 2 inches apart on the baking sheet. Use a fork to press down lightly in a crisscross pattern for a rustic look. For uniform shapes, use a round cookie cutter or glass.
How do I store these cookies to keep them fresh?
Store in an airtight container at room temperature for up to 5 days. For longer storage, freeze shaped cookies (before baking) on a tray for 3 months. Thaw at room temperature—no need to reheat. The glaze helps maintain freshness if applied before storage.
What if my cookies spread too much during baking?
This usually happens when the dough is too warm. Always chill the dough for at least 2 hours before pressing. If you're in a hurry, chill for 1 hour in the freezer. Also ensure your oven is fully preheated and use parchment paper to prevent sticking.
Can I add mix-ins like nuts or chocolate chips?
While traditional recipes avoid mix-ins, you can fold in ½ cup chopped walnuts or pecans or ½ cup mini chocolate chips after combining wet and dry ingredients. Just don't overmix—keep stirring to a minimum to preserve the tender texture.